Repair Guide
Each SukkhaCitta piece comes with a promise of lifetime repair.
To make it as easy as possible, we created Repair Guides for you to try, provide any necessary spare parts,
and of course provide repair services whenever you need it.

Lifetime Repair Guarantee
How it works
How it works
- Print and complete this Repair Form.
- Make sure your piece(s) is/are clean.
- Attach the Repair Form with your piece(s).
- Send it to us or drop it off to our flagship in ASHTA District 8.
Upon receiving your piece(s), we will email you a case number, the assessment, and the estimated completion date (up to 6 weeks).
Please note that repairs are evaluated on a case by case basis. For issues related to product quality, we will perform the necessary repairs free of charge. In heavy cases that require alterations and replacements due to usage, reasonable fees will apply.
Repairs will never be performed without your written authorization.
- Print and complete this Repair Form.
- Make sure your piece(s) is/are clean.
- Attach the Repair Form with your piece(s).
- Send it to us or drop it off to our flagship in ASHTA District 8.
Upon receiving your piece(s), we'll email you a case number, the assessment, and the estimated completion date (up to 6 weeks).
Please note that repairs are evaluated on a case by case basis. For issues related to product quality, we will perform the necessary repairs free of charge. In heavy cases that require alterations and replacements due to usage, reasonable fees will apply.
Repairs will never be performed without your written authorization.
Only 1% of clothing is recycled each year.
Together, let's close the loop.
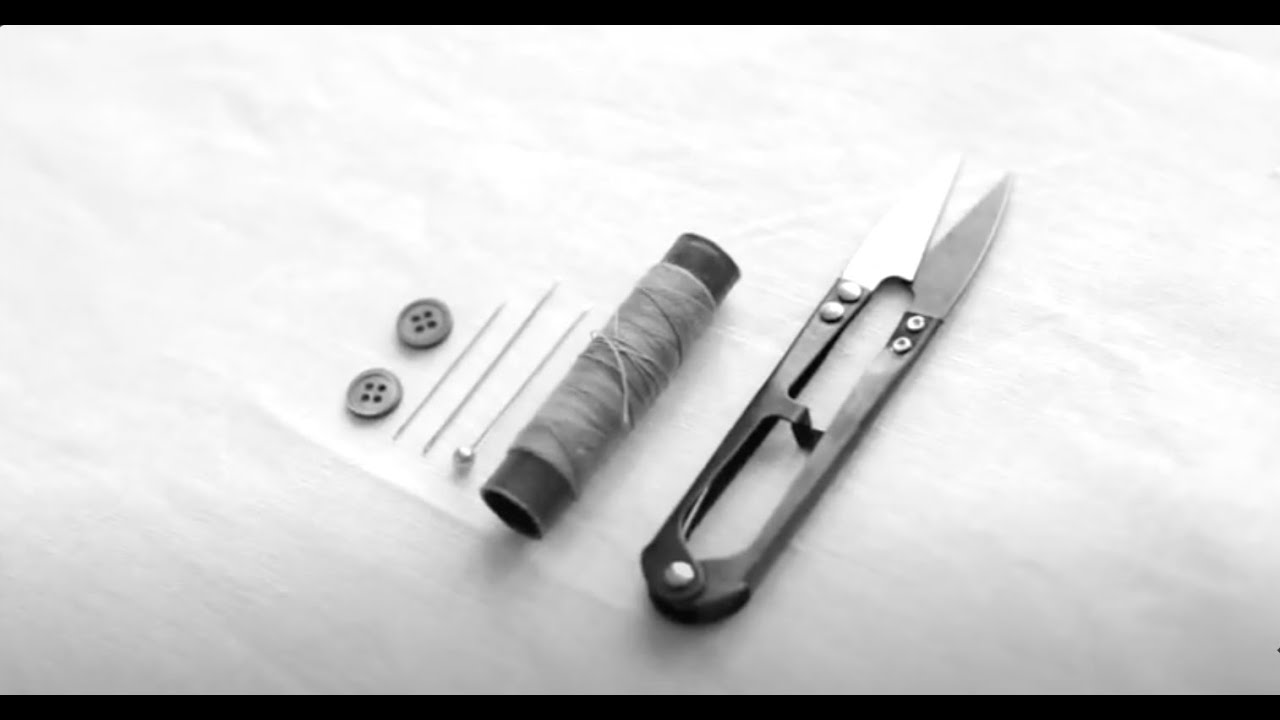
DIY: Fixing a Button
Did you know? Your #MadeRight piece always comes with a spare button on the care label.
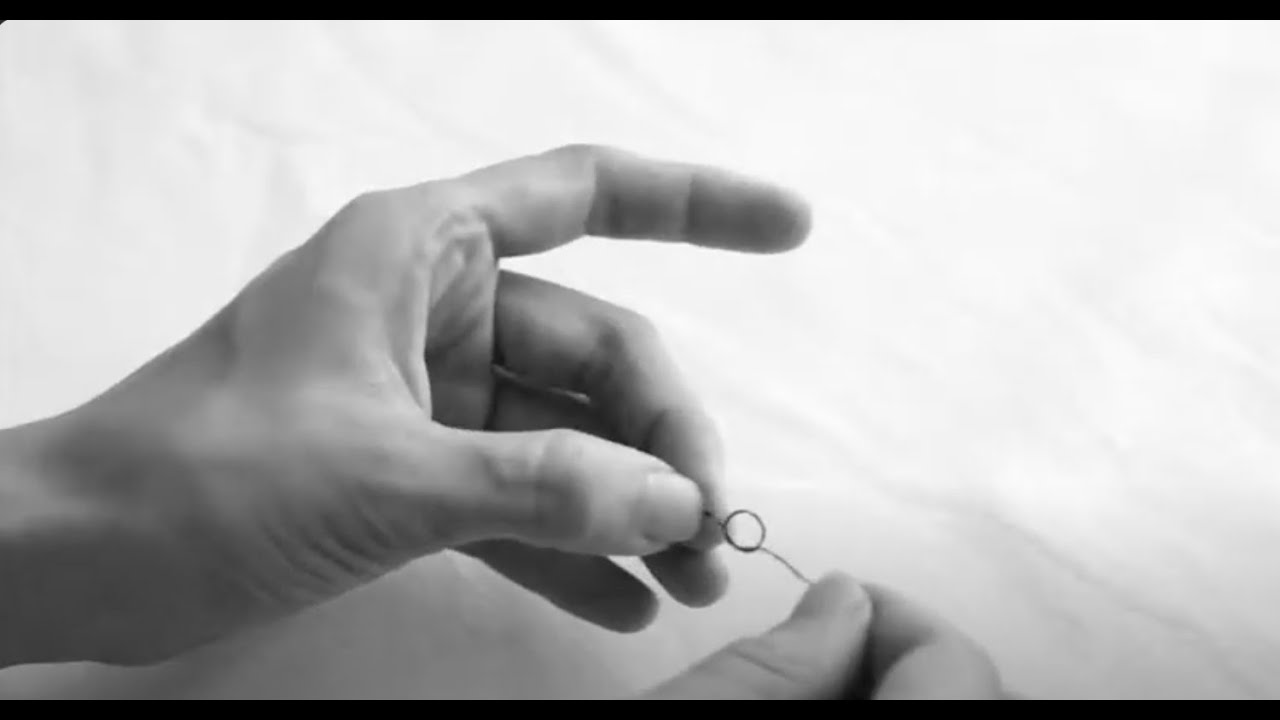
STEP 1
- Thread the needle through the eye of the needle
- Double it until you have equal length of thread on both sides.
- Create a knot.
STEP 2
- Make an anchor point for the button.
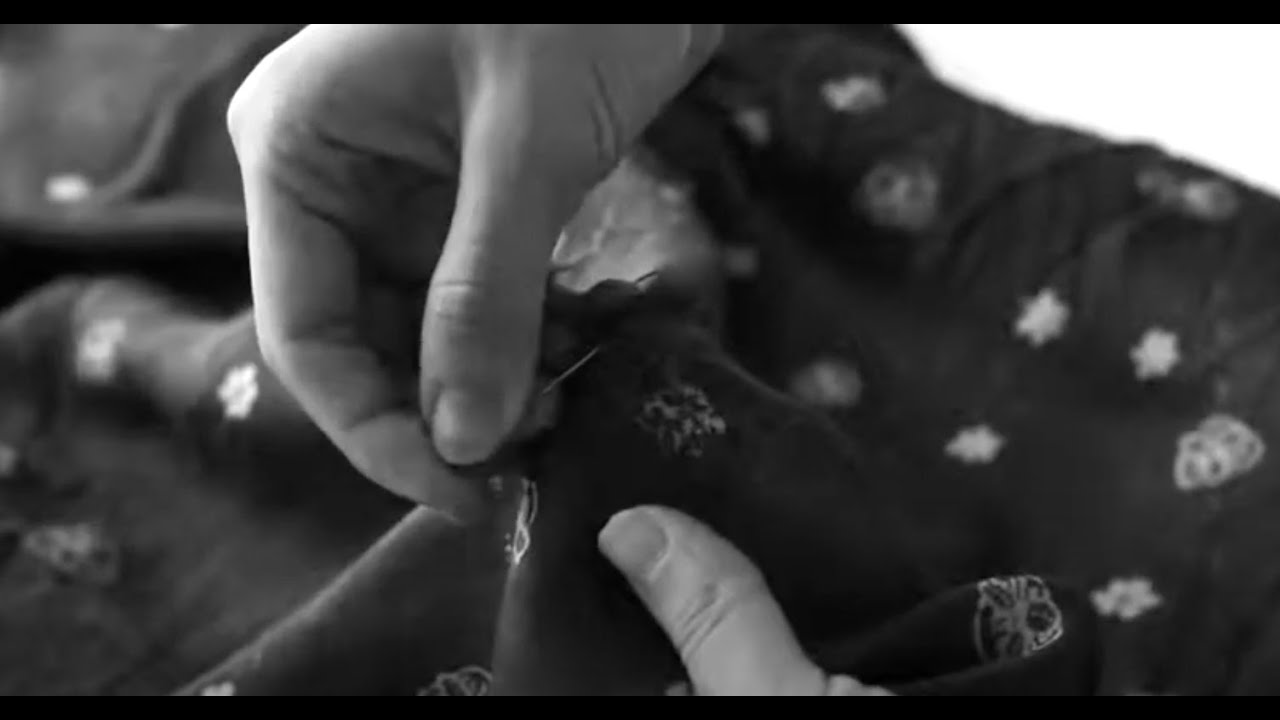
STEP 3
- Put the button in and begin sewing from one side to another diagonally.
STEP 4
- Place a spacer (could be a pin, toothpick, needle, small stick).
- Continue sewing diagonally to the other holes.
- Repeat the sewing process 3-4 times.
- Remove the spacer once you’ve done sewing.
- Ensure your needle is facing down when reaching your last hole.
STEP 5
- Wrap the threads around the button 4-5x.
STEP 6
- Make a small knot and cut to finish.
DIY: Fixing a Hole
Do you have a hole in the fabric? Don't fret! We can embroider over them for you, or you can try to darn them yourself.
STEP 1
- Thread the needle through the eye of the needle
- Double it until you have equal length of thread on both sides.
- Create a knot.
STEP 2
- Stitch together from approx. 1 cm from the edge of the hole.
- Stitch on the outer part of the fabric.
STEP 3
- Continue to start stitching horizontally on the part of the hole from one side to another.
- Once you’ve reached the other edge of the hole, pin the needle upside down to the inner part of the fabric.
STEP 4
- Pin the needle back to the outer part of the fabric and start stitching vertically.
STEP 5
- Once you’ve reached the last corner, pin the needle to the inner part of the fabric.
- Cut some undesired threads.
- Then pin the needle back to the outer part of the fabric.
- Create a small knot and cut it off to finish.
DIY: Fixing a Hole Pt.2
Still not satisfied? We can continue on.
STEP 6
- Repeat step 1 and sew and anchor.
- Sew from one edge to another vertically.
- Continue this step until you cover the hole thoroughly.
- Once you’ve reached the last part, pin the needle down to the inner part and up to the outer part again.
STEP 7
- Now sew the threads as if you were weaving the threads from one edge to another horizontally.
STEP 8
- Pin the needle down to the inner part of the fabric
- Create a knot and cut to finish.
